The Item Builder: Editing Items
How to edit items and what to expect
Date: 6/4/2023
Category: SoulMS
If you haven't read the first article on how to create items. Then click the link here
How to Edit and View Items
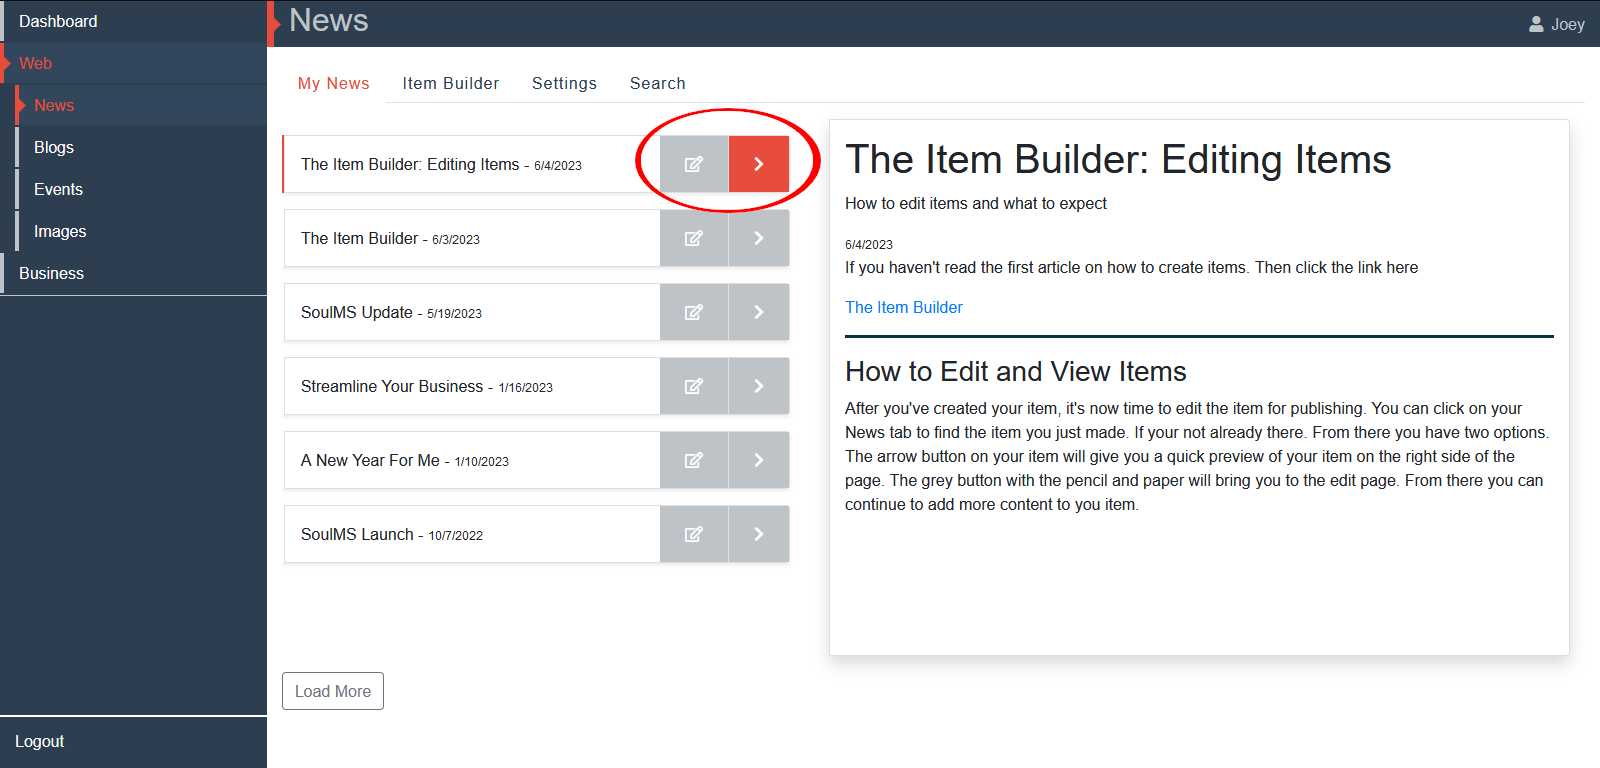
After you've created your item, it's now time to edit the item for publishing. You can click on your News tab to find the item you just made. If your not already there. From there you have two options. The arrow button on your item will give you a quick preview of your item on the right side of the page. The grey button with the pencil and paper will bring you to the edit page. From there you can continue to add more content to you item.
Once in edit mode you can either keep adding to you item, proof read your item in the Quick View tab, or change the options of the item.
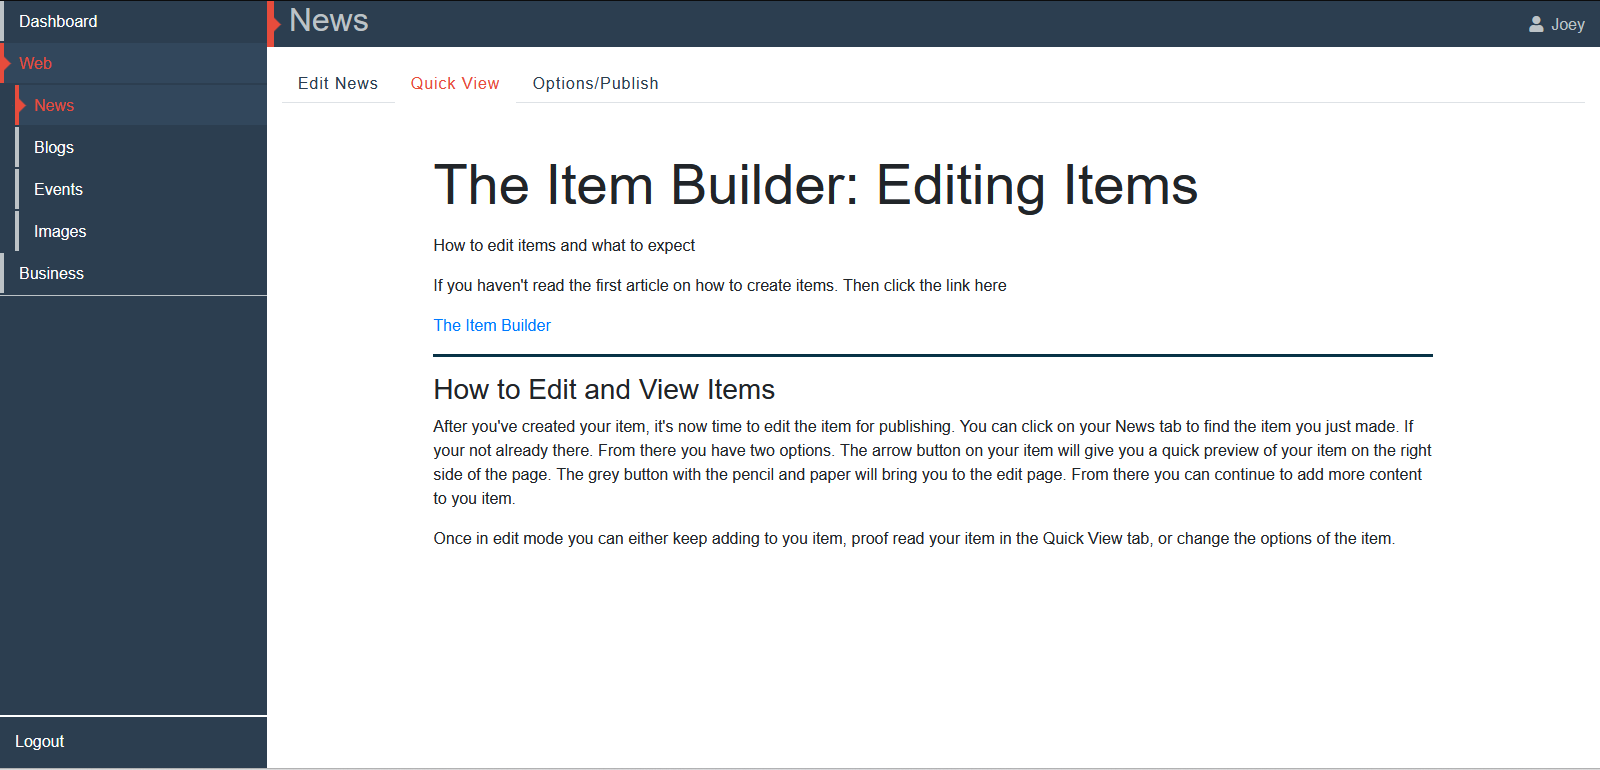
Lets say you're ready to publish your item but haven't made it the point where you're confident enough to show your users. The Quick View tab is a great way to proof read your item and go over your notes on what you need your item to say, look, or do. The Quick View allows the user to view changes in their item in real time before saving their work. Which gives them a sense of what their looking for. To me it's a great tool when writing a article with the item builder and not fully knowing how it's going to look in the end.
Quick View however does not support inserted images or videos before saving the work. This is due to Youtube not allowing videos to be dynamically inserted into websites that are not managed by Google. In the future images will be dynamically inserted but for now you need to save your work before viewing the sections in Quick View.
I often tend to save my work and go back into edit mode in general. You never know when the internets going to kick off.
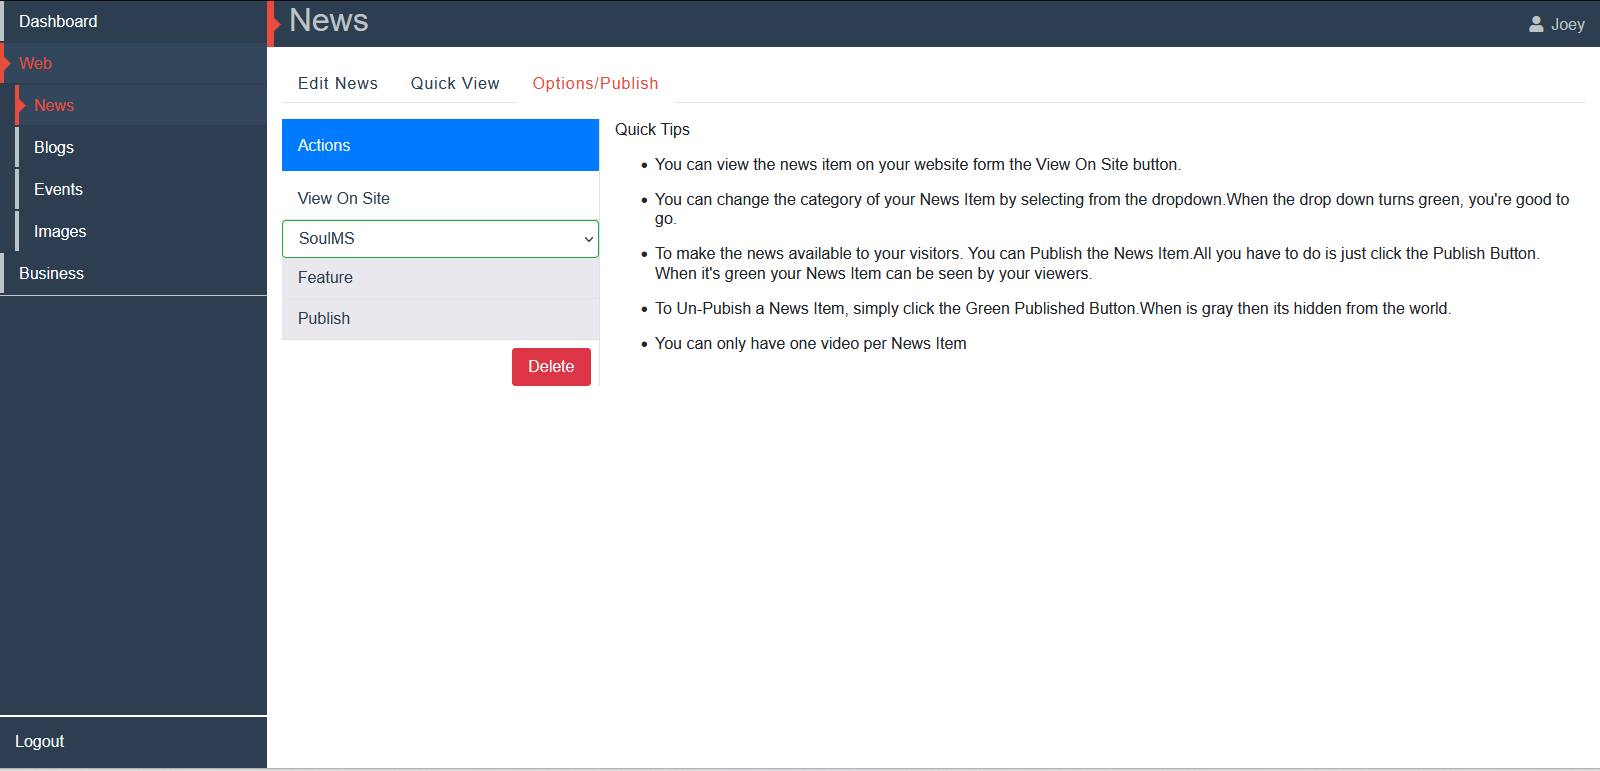
The only difference between the Quick View and your own site is that the styling of your site may differ from the styling in SoulMS. This however can be viewed in the options tab. Where you can click "View on Site" and it will bring you to your site with the item you're working on. Thats if you want a full understanding on how the your item is going to look on the site.
In the options tab you have everything you need to complete your item. First it's crucial to organize your items in categories. This way people are able to find them easier when looking for certain items. You also, since there is a search feature for you to find your work. Keeping categories are easy to maintain and takes a load off when organizing your items.
If you want your item to stand out. Make it a "featured item". This will allow me to make a custom component to only show featured items in a certain way on your page, and if it's categorized correctly I can make it even more dynamic and viewable for the user trying to find information about your site.
Now when everything is set. You're done with your proof reading, the category, and you've decided if it's featured or not. It's time to publish your item. This allows the item to be viewed on any component that is showing, lets say the newest news items.
Make sure you've submitted any changes to the item before exiting the browser. If you've made changes to the item without saving. Then the changes will be lost. Changing category, featured, and published are all real time, and will be highlighted green when finished. However submitting changes to the item is not real time and take you to submit the changes before hand.
Conclusion
The Item Builder is meant to be easy to use with the idea of keeping your content dynamically friendly to the responsive web environment. I feel as if I've provided the correct tools to do so. If you're interested to learn more or want to try out the Item Builder yourself. Please contact me.